In the last article we saw how to connect to ZooKeeper, elect a client, read it’s configuration and react to a change in the number of agents subscribed to the elected client. All this was required to implement the first state in our application typology (figure 1). We have now a distributed, autoconfigurable application ready to work.
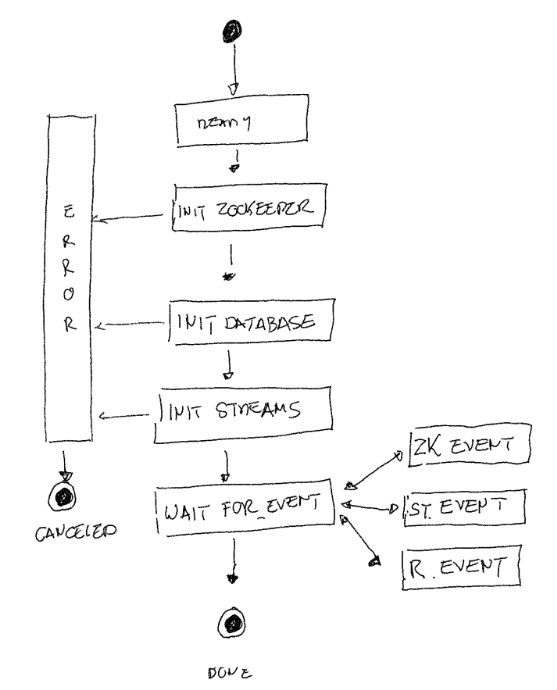
Figure 1 : Application topology
Our first use case mentions that users will have two options : either have the market data delivered to a database hosted on a platform of their choice, eg. amazon RDS, or have it hosted on our platform.
Today we are going to add this functionality to our project and dynamically configure a datasource. As usual, the code for this article is available in a dedicated branch on github
The project relies on Spring Data JPA and Flyway DB. Flyway is an open-source database migration tool. Spring Boot integration for Flyway DB automatically check if the database structure is at the expected level. When it detects that the schema requires an update, it automatically applies the provided migration scripts before running the application.
Finally, we’ll use PostgreSQL. Support for other databases will be added later.
Let’s start by the required dependencies (figure 2)
  <dependency>
      <groupId>org.springframework.boot</groupId>
      <artifactId>spring-boot-starter-data-jpa</artifactId>
    </dependency>
    <dependency>
      <groupId>org.postgresql</groupId>
      <artifactId>postgresql</artifactId>
    </dependency>
    <dependency>
      <groupId>org.flywaydb</groupId>
      <artifactId>flyway-core</artifactId>
    </dependency>
Figure 2 : maven dependencies
As we don’t know the database configuration before electing a client , we need to deactivate spring boot Datasource automatic configuration. The annotations in figure 3. will take care of that.
@SpringBootApplication(exclude = { DataSourceAutoConfiguration.class, DataSourceTransactionManagerAutoConfiguration.class, HibernateJpaAutoConfiguration.class, FlywayAutoConfiguration.class})public class PheidippidesApplication {
Figure 3 : deactivation of spring boot auto-configuration
Routing requests
The datasource routing will be managed by RoutingDataSource. This class relies on Spring’s AbstractRoutingDatasourceto that provides a usefull squeleton (figure 4).
public class RoutingDataSource extends AbstractRoutingDataSource { private static final String REMOTE = "remote"; private static final String DEFAULT = "default"; private final Map<String, DataSource> dataSources = new HashMap<>(); public RoutingDataSource(DataSource defaultDatasource) { dataSources.put(DEFAULT, defaultDatasource); } @Override protected Object determineCurrentLookupKey() { if (dataSources.containsKey(REMOTE)) return REMOTE; return DEFAULT; } @Override protected DataSource determineTargetDataSource() { String lookupKey = (String) determineCurrentLookupKey(); return (DataSource) dataSources.get(lookupKey); }public void createRemoteDatabase(String url, String user, String password) { if (!dataSources.containsKey(REMOTE)) { DriverManagerDataSource dataSource = new DriverManagerDataSource(); dataSource.setUrl(url); dataSource.setUsername(user); dataSource.setPassword(password); ... dataSources.putIfAbsent(REMOTE, dataSource); } else throw new IllegalStateException("Remote database has already been created"); }
Figure 4 : RoutingDataSource implementation
The class maintain a map with all configured datasources. Once a client has been elected and it’s database information has been retrieved, a new datasource is created and added to the datasource map.
Creation is done in the createDataSource method. This method creates and configures the new datasource and initiates Flyway migration if required.
DetermineCurrentLookupKey selects the key to access the target datasource in the map. As long as no « remote » database exists, the program will use the default datasource. Once a datasource is added to the map the program uses it.
Please note that RoutingDataSourceBean is instantiated as a singleton.
  public DataSource createDefaultSource() {
    DriverManagerDataSource dataSource = new DriverManagerDataSource();
    dataSource.setDriverClassName(defaulDBPDriver);
    dataSource.setUrl(defaulDBUrl);
    dataSource.setUsername(defaulDBUsername);
    dataSource.setPassword(defaulDBPassword);
    return dataSource;
  }
  @Bean
  @Scope("singleton")
  public RoutingDataSource routingDatasource() {
    return new RoutingDataSource(createDefaultSource());
  }
Figure 5 : RoutingDataSource instantiation
FlyWay DB
Once a new datasource has been created, the Flyway migration is initiated, upgrading the schema if required (figure 6). The scripts are located in the db/migration directory.
  public void createRemoteDatabase(String url, String user, String password) {
    if (!dataSources.containsKey(REMOTE)) {
      ....
      Flyway flyway = Flyway.configure()
        .dataSource(url, user, password)
        .locations("db/migration")
        .load();
      flyway.migrate();
      dataSources.putIfAbsent(REMOTE, dataSource);
    }
    else
      throw new IllegalStateException("Remote database has already been created");
  }
Figure 6 : Flyway migration
The files in the migration directory are written in psql. See figure 7 for an example.
drop table IF EXISTS CONFIG CASCADE;CREATE TABLE CONFIG( ID SERIAL PRIMARY KEY, CODE varchar(50) NOT NULL, TYPE varchar(50) NOT NULL, VALUE text NOT NULL);
Figure 7 : flywax migration script
EntityManagerFactory and EntityManager
Finally, two more beans need to be configured : first, entityManagerFactory. This factory is responsible to build the entitymanager associated with a persistence context.
The set of entities managed by our entity manager are defined by a persistence unit. A persistence unit « defines the set of all classes that are related or grouped by the application, and which must be colocated in their mapping to a single database« .
The factory requires a datasource, a base package to scan for entities, and a JpaVendorAdapter (figure 8).
  @Bean
  public LocalContainerEntityManagerFactoryBean entityManagerFactory(RoutingDataSource routingDatasource) {
    LocalContainerEntityManagerFactoryBean em
      = new LocalContainerEntityManagerFactoryBean();
    em.setDataSource(routingDatasource);
    em.setPackagesToScan(new String[]{"ch.nblotti.Pheidippides"});
    JpaVendorAdapter vendorAdapter = new HibernateJpaVendorAdapter();
    em.setJpaVendorAdapter(vendorAdapter);
    em.setJpaProperties(additionalProperties());
    return em;
  }
Figure 8 : the entity manager factory
The second bean is a transaction manager (figure 9) to control transactions. The transaction manager manages the transaction boundary for our entity manager. As we are not going to access multiple transactional resources within the same transaction, we will use the JpaTransactionManager implementation.
 @Bean
  public PlatformTransactionManager transactionManager(RoutingDataSource routingDatasource) {
    JpaTransactionManager transactionManager = new JpaTransactionManager();
    transactionManager.setEntityManagerFactory(entityManagerFactory(routingDatasource).getObject());
    return transactionManager;
  }
Figure 9 : the transaction manager
Everything is ready. Let’s add some monitoring capacity to our project
Monitoring
We want to use Prometheus and Grafana to monitor our application (see example in figure 10)
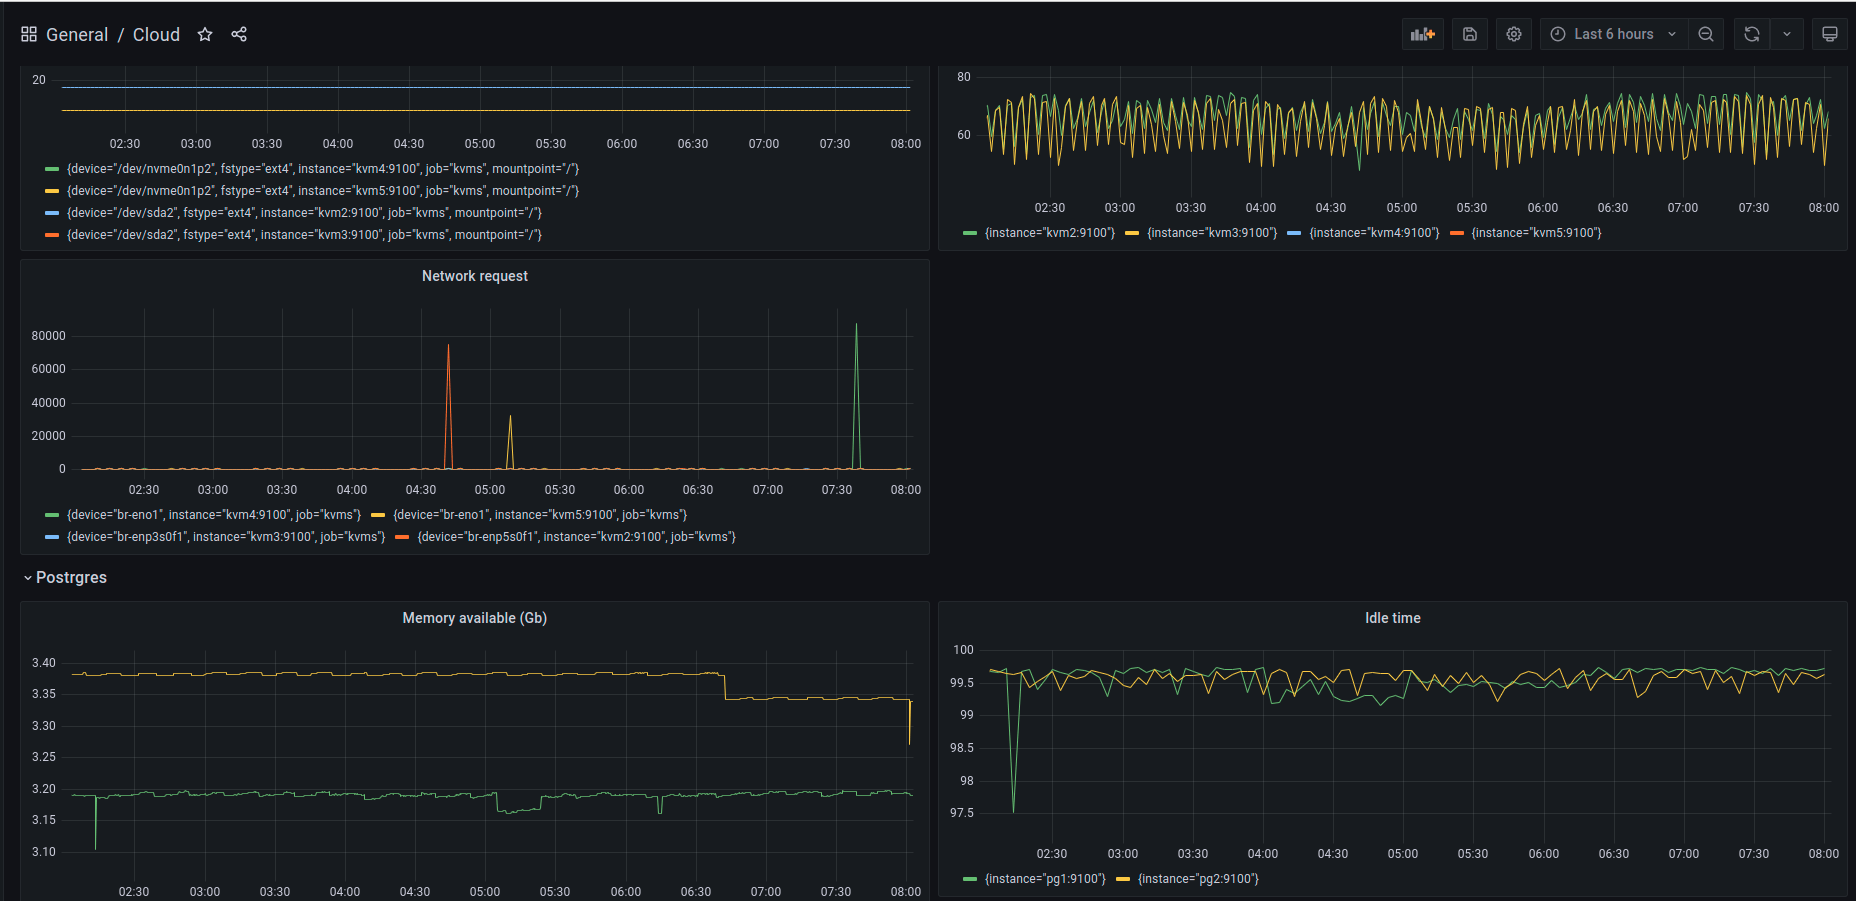
Figure 10 : a Grafana dashboard
Prometheus is an open-source monitoring framework. It provides out-of-the-box monitoring capabilities for the Kubernetes container orchestration platform. It will collect all information. Promteheus installation is described here and here.
Grafana is an open-source lightweight dashboard tool. It can be integrated with many data sources like Prometheus, AWS cloud watch, Stackdriver, etc. Grafana installation is described here
Finally, our application uses spring boot actuator and micrometer (figure 11) to export metrics.
<dependency>
    <groupId>org.springframework.boot</groupId>
    <artifactId>spring-boot-starter-actuator</artifactId>
</dependency>
<dependency>
    <groupId>io.micrometer</groupId>
    <artifactId>micrometer-registry-prometheus</artifactId>
</dependency>
Figure 11 : Actuator dependencies
Available endpoints need to be configured in application.properties (figure 12).
management.endpoints.web.exposure.include=*
management.endpoints.web.exposure.exclude=
Figure 12 : Endpoint configuration
K8s services need to be adapted (figure 13) to let prometheus know metrics should be collected for this service.
apiVersion: v1
kind: Service
metadata:
  name: nblotti-pheidippides
  annotations:
    prometheus.io/scrape: 'true'
    prometheus.io/port: '8080'
    prometheus.io/path: "/actuator/prometheus"
    prometheus.io/scheme: "http"
spec:
  selector:
    app: nblotti_pheidippides
  type: NodePort
  ports:
    - protocol: TCP
      port: 8080
      targetPort: 8080
Figure 13 : k8s service configuration
Et voilà ! Next time we will use Kafa, Kafka Streams, Kafka connect, Debezium and Apicurio registry to stream data to our new database.
Laisser un commentaireAnnuler la réponse.